Using Custom Fields
Custom Fields help you track additional information about a site. The name and the options for the field are up to you and there are endless possibilities. Here are a few examples to show you how Custom Fields can work:
- Location
- Asset Type
- People or Staff
- Priority
Viewing fields on your dashboard table
You can view custom fields or SHYFT-created fields as columns in your dashboard table.

You can also view your custom fields in the Site Snapshot pane. From the Site Snapshot pane, you can edit or assign an option for a custom field.
SHYFT-created custom fields
SHYFT has created pre-set fields or metrics you can enable in your dashboard by selecting Customize. You can access a list of SHYFT configured metrics or custom fields here.
Edit or Delete Custom Fields
To edit a custom field:
- Click the Customize button
- Hover over the field you want to edit then click Edit
- Drag and drop the options to rearrange them in your Custom Field.
- To edit the custom field, sort, add, or remove options then click Save Changes
- To permanently delete the custom field and any data tied to it, click Delete Field.
Hide a Custom Field or SHYFT-Field
You can hide a Custom Field of SHYFT Field by clicking the Customize button and pressing the toggle icon.
Permissions
Modifications to dashboards can only be made by administrators.
Sort using the caret in your column header
You can sort columns in your table including Custom Fields and SHYFT Fields using the caret in the table header.
Create Custom Fields

You can add custom fields to the sites as per your requirement. To do that follow the below-mentioned steps:
- Login as admin to the SHYFT Power application & go to the site's dashboard.
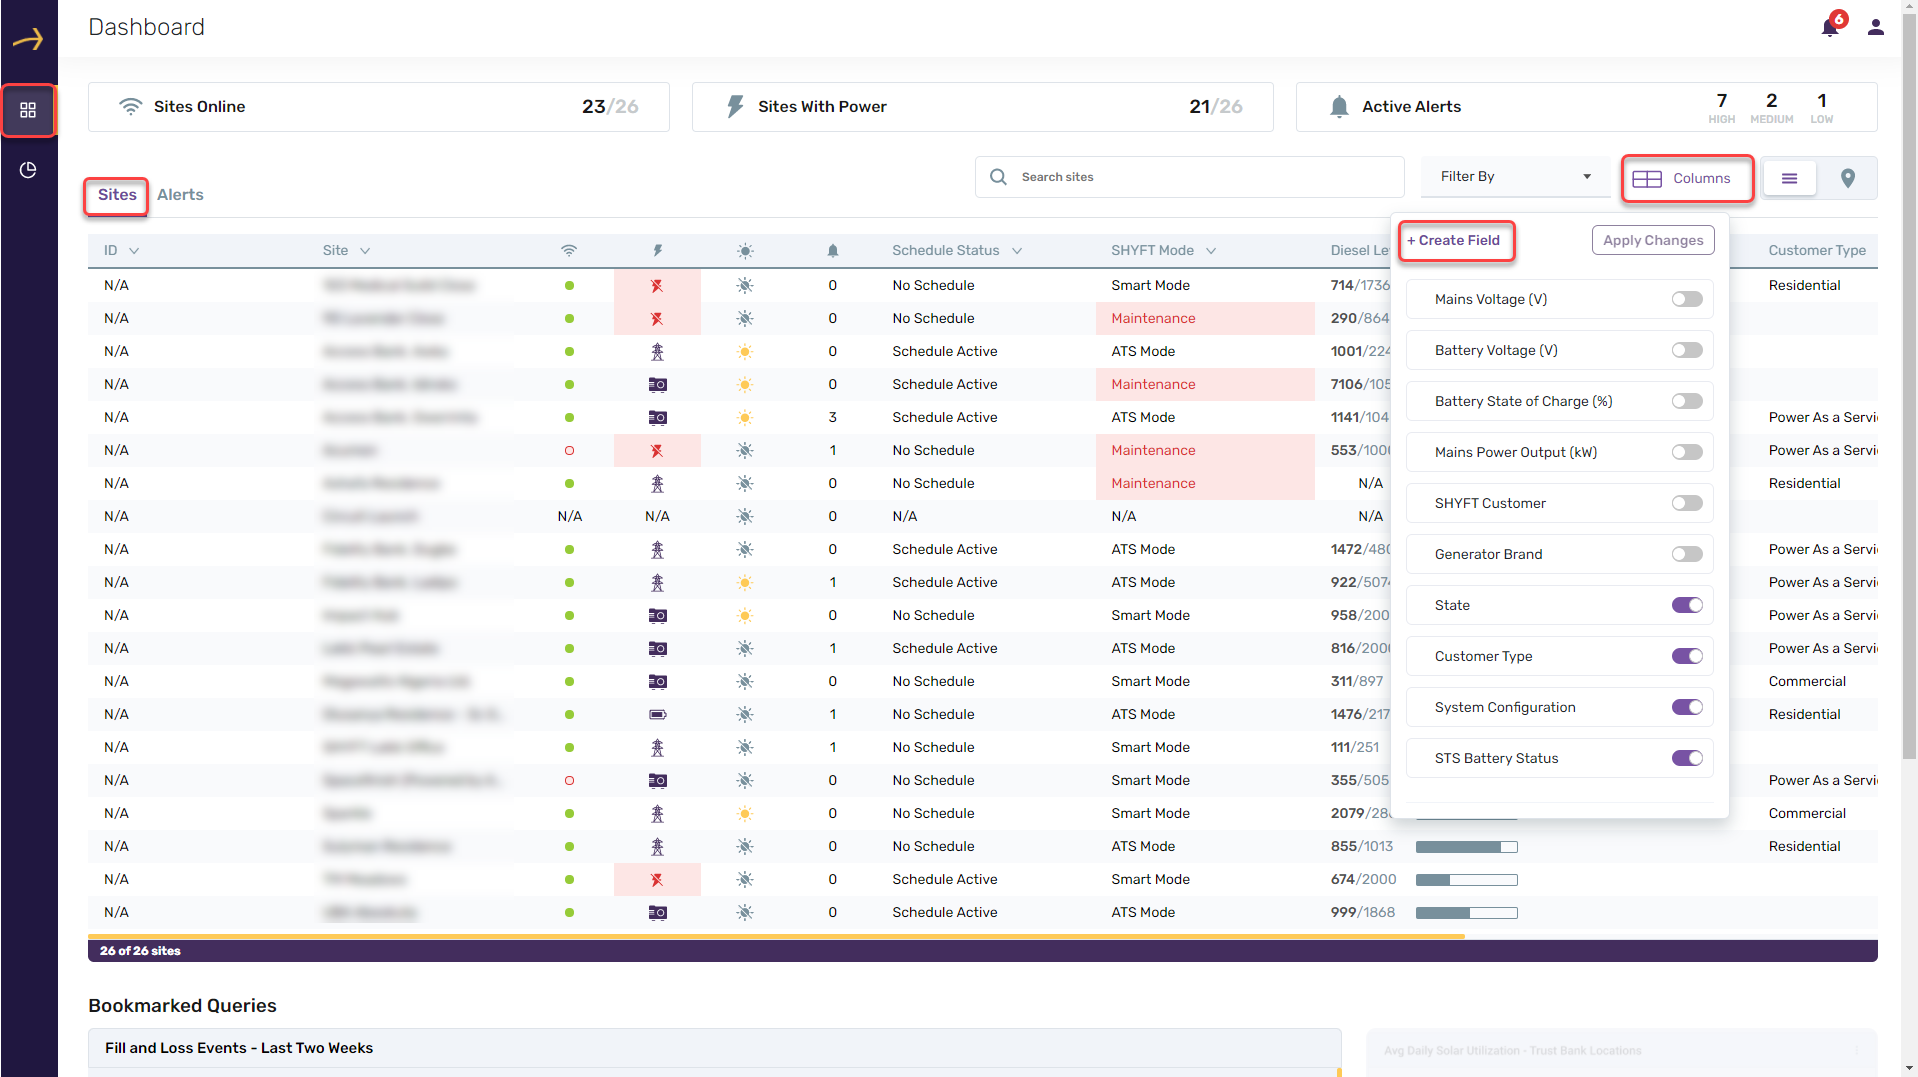
- Click on the Columns tool button as highlighted in the below screenshot. It will open the dropdown list of the various custom fields.
- On the top of this custom field list you will see the link button named “+ Create Field”. Click on this button.
- Clicking on the “+ Create Field” button will open a pop-up window where you need to enter the title and description of the custom field you would like to add. Please check the related screenshot. below.

- In the create new field pop-up you will also see the button named “Add Option”. Clicking on this button will open new text boxes on every click where you can add the various needed options of the field as needed. Please check the below screenshot:

- Click on the “Add Field” button to save the custom field.
Comments
Please sign in to leave a comment.